
Labels
1) Identify the ports needed to open:
In our CUST domain, the ports used for Active directory are published in this article: What firewall ports are used by Active Directory? However these ports assume that the RPC port has been configured to be static. In our CUST domain, it has been configured for TCP 1025. The default AD installation is to use TCP ports above 1023, but you can also set the static RPC TCP port by following these instructions: Active Directory Static RPC Port on each Domain controller.

The above chart assumes you have configured the static RPC port to TCP 1025 instead of the default ports TCP Greater than 1023.
2) Where to open the firewall.
- If this is for Hybrid cloud you will need to open up the ports on the Cloud firewall (Cloud GUI) as well as the firewall on the Ash01 (Standard Text through networking Team) side.
- If you have two networks in cloud (DMZ and Trust) you will want to open up the firewall for each network.
The Atempo backup software is VERY sensitive to DNS names as well as case. In other works, it tends to be very compliant to what you would normally expect from a Linux server. Therefore, there are (2) general scenarios where this problem manifests itself:
If the server name is not resolvable to the backup client, backup server and backup admin station - in this configuration, it is normal that the server will not be accessible via the Atempo console. to resolve this typically you have to fix the DNS entries to match across all systems so that the name is resolvable to the right IP Address.
If the backup client and backup server are not of the same version, connecting directly to the backup client for administration is usually not allowed - Currently, the only way to fix this is to upgrade the client to the latest version the backup server is running. However, to work around this issue, you can manually enter in the inclusions into the interface or you can log into the GUI from the backup client (Windows only) and try to administer the settings from there.
It's very common for web applications to send redirects after a form POST submission, as it works around the dreaded page-refresh = double form submission problem that can cause nightmare scenarios like double credit card charges and the like. A redirect is a response by the web server asking the web browser to load another page. Unlike URL's embedded in HTML, redirects cannot be "relative", meaning they must be fully qualified with scheme, host, and port parts if required.
As I'm sure most everyone is aware, hardware SSL accelerators offload the cpu-intensive SSL operations and allow a web application to deal strictly with HTTP. Effectively the accelerator is encapsulating and de-encapsulating the SSL "headers" for the web application. As a result, the web application is unaware of operating in an HTTPS context, and in fact has no way to identify that customer browsers are operating in such a context except through external configuration of some sort. It's not possible to automatically identify that a hardware accelerator is in place if you're writing code that lives in the web application space.
Finally, despite the fact that redirects cannot be relative, it's very common to try and support specifying them relatively in software. This is done by having web frameworks automatically handle the generation of the final redirection URL, using knowledge the web application has about the context it's running in. Normally this allows for things like transparently moving the web application from host to host (dev to test, or test to staging, etc) without having to re-specify every redirect in some configuration file or build a facility in the web application to allow 'smart' redirect writing. Since a web application can have potentially many redirects, this is a Good Thing.
The fact that a web application behind a hardware SSL accelerator cannot identify that it's running in an HTTPS/SSL context means that when redirects are automatically generated by a framework, the URLs are generated incorrectly. The scheme portion is generated as http, resulting in a page such as:
https://www.customer.com/app/blah.do?somestuff=whatever
redirecting to:
http://www.customer.com/foo/bar.do?baz=bat
There are two potential problems here. Either http traffic is not accepted by the web application, in which case the second URL fails to load, or http traffic is accepted but the person has moved from a secure context to an insecure context. Not only is this a potential problem for application security, Internet Explorer will pop up a nasty dialog saying that you've just been redirected to an insecure context and your life secrets may be leaking into the ether. Neither scenario is very good for customers.
One supported solution is to somehow affect the framework's redirect URL generation facility so that it writes them correctly in the first place, without a ton of configuration. It turns out that this is possible in Tomcat, and since Tomcat is the embedded servlet engine for JBoss, Weblogic, and more, it becomes a transitive solution for most (all?) of our customers running in a Java environment.
As you might be aware, web applications sometimes run behind a proxy. The SSL accelerators we use aren't proxies, so it doesn't exactly spring to mind to treat them like proxies, but if we do our eyes naturally move to a portion of the Tomcat configuration regarding proxies. Specifically, you can specify the proxy's name, port, and most importantly the scheme the proxy uses to talk to clients. We can use this ability to configure Tomcat to behave as if we're running in an SSL context without actually incurring the CPU/configuration cost of running SSL directly on the web servers. Doing this is a very simple change:
1) Find the server.xml config file for your app server. It should mention Tomcat/Catalina stuff, if it doesn't you're in the wrong file.
2) Find the section of the file with a <Connector ...> tag referring to the port your app server runs on. In JBoss this is done with a variable, and in Tomcat the port is specified directly (usually as 8080). This tag should not be commented out, and many are. XML comments are the same as HTML, and read <!- stuff commented out ->. So if that's wrapped around the tag you're looking at, you've got the wrong tag.
3) Once you've found it, add three attributes to this tag:
proxyName="www.yourcustomer.com"
proxyPort="443"
scheme="https"
4) Restart your app server and test that the change works. I reccomend using Firefox and the LiveHTTPHeaders plugin to see what's going on directly.
It'd be nice if you didn't have to set the proxyName, since this is a configuration setting you'll have to change depending on whether the application is running on a staging URL or not, but unfortunately Tomcat will not honor the scheme setting if you don't. You may also find some reference to setting secure="true" in Googling around about this problem. Don't do it. That tells Tomcat to really turn SSL on, at which point it starts to look for certs and keystores and just generally goes down the path we're trying to avoid with the SSL accelerator in the first place.
The following link details how to move a Cluster Quorum group in Windows 2008:
(How to setup tomcat in windows to use a data source to connect to MSSQL database)
Requirements:
(This guide assumes the following)
Tomcat 7.0 installed and working with defaults settings
MSSQL setup and working with an account that can access the database
Icon
For these examples:
"test" is used for resource name and "testDB" is used for the connection name: This can be changed but make sure to change all of them.
- Step 1: Log into the server running Tomcat
- Step 2: Download the following file JDBC Drive for SQL
- Step 3: Place the file sqljdbc4.jar in the following folder (%Tomcat Root%\lib)
- Step 4: Edit the server.xml file (%Tomcat Root%\conf)
- The following code should be added in the <GlobalNamingResources> section
<Resource name="test" auth="Container"
type="org.apache.catalina.UserDatabase"
description="User database that can be updated and saved"
factory="org.apache.catalina.users.MemoryUserDatabaseFactory"
pathname="conf/tomcat-users.xml" />
<Resource name="jdbc/testDB" auth="Container" type="javax.sql.DataSource" />
<ResourceParams name="jdbc/test">
<parameter>
<name>factory</name>
<value>org.apache.commons.dbcp.BasicDataSourceFactory</value>
</parameter>
<parameter>
<name>maxActive</name>
<value>5</value> <!-- consult Tomcat docs for this value's meaning -->
</parameter>
<parameter>
<name>maxIdle</name>
<value>5</value> <!-- consult Tomcat docs for this value's meaning -->
</parameter>
<parameter>
<name>maxWait</name>
<value>10000</value> <!-- consult Tomcat docs for this value's meaning -->
</parameter>
<parameter>
<name>username</name>
<value>DB User Name</value> <!-- Change "DB User Name" to user name of account used to access SQL -->
</parameter>
<parameter>
<name>password</name>
<value>DB Password</value> <!-- Change "DB Password" to password of account used to access SQL -->
</parameter>
<parameter>
<name>driverClassName</name>
<value>com.microsoft.sqlserver.jdbc.SQLServerDriver</value>
</parameter>
<parameter>
<name>url</name>
<value>jdbc:sqlserver://IPAddress:1433/DBName</value> <!—Change "IPAddress" to the IP address of the DB server or the DB cluster IP address, Change "DBName" to the database name you want to connect to, 1433 is the default port change if using something else -->
</parameter>
</ResourceParams>
- Step 5: Update the context.xml file (%Tomcat Root%\conf)
This code need to be in the <Context> section
<Resource name="jdbc/testDB" auth="Container" type="javax.sql.DataSource"
maxActive="100" maxIdle="30" maxWait="10000"
username="DBUser_Name" password="DB_Password"
<!-- Change "DBUser_Name" to user name of account used to access SQL, Change "DB_Password" to password of account used to access SQL -->
driverClassName="com.microsoft.sqlserver.jdbc.SQLServerDriver"
url="jdbc:sqlserver://IPAddress:1433;databaseName=DBName"/>
<!-- Change "IPAddress" to the IP address of the DB server or the DB cluster IP address, Change "DBName" to the database name you want to connect to, 1433 is the default port change if using something else -->
- Step 6: The following .jsp page can be used to test the connection, Name the file dbtest.jsp
Viewing the file in a browser should show a list of numbers, these are numbers of the rows in what database you are connecting to.
<html>
<head><title>Enter to database</title></head>
<body>
<table>
<%@ page import="java.util.*" %>
<%@ page import="javax.sql.*;" %>
<%
java.sql.Connection c1;
java.sql.Statement s1;
java.sql.ResultSet rs1;
java.sql.PreparedStatement pst1;
DataSource testDB;
c1=null;
s1=null;
pst1=null;
rs1=null;
javax.naming.Context initCtx = new javax.naming.InitialContext();
javax.naming.Context envCtx = (javax.naming.Context) initCtx.lookup("java:comp/env");
testDB = (DataSource) envCtx.lookup("jdbc/testDB");
try{
if(testDB == null) {
javax.naming.Context initCtx1 = new javax.naming.InitialContext();
javax.naming.Context envCtx1 = (javax.naming.Context) initCtx1.lookup("java:comp/env");
testDB = (DataSource) envCtx1.lookup("jdbc/testDB");
}
}
catch(Exception e){
System.out.println("inside the context exception");
e.printStackTrace();
}
c1 = testDB.getConnection();
String sq1= "select * from master.dbo.sysdatabases"; <!-- This is the query that will run on the database -->
pst1 = c1.prepareStatement(sq1);
rs1 = pst1.executeQuery();
while( rs1.next() ){
%>
<tr>
<td><%= rs1.getString("dbid") %></td> <!--This is the string the will be displayed on the web page -->
</tr>
<%
}
if(pst1!=null) pst1.close();
if(rs1!=null) rs1.close();
if(c1!=null) c1.close();
%>
</body>
</html>
To test: On the tomcat server open IE and go to http://localhost/<site folder>/dbtest.jsp
For based on these examples ("jdbc/testDB") is what clients would need use for DataSource in there code to connect to the configured data base.
OpenSSL
OpenSSL is a widely used library and toolkit for integrating encryption into products, like the Apache httpd server. Besides being a library somewhere in the system directory tree, it comes with a set of command-line tools to help you create and manage keys, certificate requests, certificates and revocations. The main tool is the command 'openssl' which if invoked with no other parameters, acts like a shell, allowing you to type in special OpenSSL commands to perform various operations.
There is a distinct and important relationship between keys and certificates. A certificate is a bunch of data that has been encrypted by a key. A key is some data that has been encrypted by a password. I can see the wheels turning and you're about to ask "why are we using a password to encrypt what is essentially another password? Why don't we just use our password and get rid of the key?" The truth is that people are terrible at creating passwords. Unless you use passwords like "0a4215ff7dc1ce10edc065233f4c07d8bc9330db1194b3648c97919a655cde288b0d6bd23329338b7ab2e6b1f2b42e727461a782a6757431d3e95c5812f759b6" then chances are, your passwords can be guessed using password crackers in a matter of seconds, probably in less than 1 second. The other truth is that computers are capable of generating keys that are mathematically superior to anything usable by a person. Computers aren't restricted to just letters, numbers and a few special characters. This allows computers to generate complex passwords that are more secure for use in cryptographic operations.
The keys and certificates are part of something called public key cryptography. This is similar to safety deposit boxes in bank vaults. When you get a vault box, there are 2 locks on the door. You are issued a key for one lock and the bank has its own key for the second lock. To open the door, you must have both keys. Now, let's extend this. You have a safe with 2 locks. The key to one of the locks you keep to yourself and never share it with anyone. This is your private key. For the other lock, you create a bunch of identical keys and share them with friends and family. These are public keys.
The process of getting a SSL certificate for use with a web site is simple:
- you generate a key
- using the key, you generate a certificate request (CSR) that contains data about the company and web site
- the CSR is sent to a Certificate Authority (CA) to be signed
- the CA signs the CSR, turning it into a certificate
- the certificate is returned and installed in the web server or SSL accelerator
Some important things to note about this process:
- a password is generally used to generate the key but this is not required
- the CA does not know nor do they require the password used to generate the key
- the certificate you are issued contains information about the CA who signed it
- each browser ships with the public key the CA, which is used to verify the information contained in the certificate
Keys
The first step in the process involves generating a key. There are, in general, three types of keys used, RSA, DSA and DH (Diffie-Hellman.) The most commonly used for SSL certificates are RSA keys. Additionally, keys can be of many sizes, specified in bits. The more bits in the key, the stronger the encryption it can afford you. You generate the key using the openssl shell. The 'genrsa' command is used for creating a RSA key. You can specify the encryption to be used to encrypt the key, a good algorithm is triple-DES or des3. You also need to specify an output file using the "-out" option, otherwise openssl will print the key to your screen. OpenSSL will prompt you for the password to use to encrypt the key.
Generating a key with a passphrase. The default key size is 512 bits:
$ openssl genrsa -des3 -out jeff.key
Generating RSA private key, 512 bit long modulus
.......++++++++++++
........................++++++++++++
e is 65537 (0x10001)
Enter pass phrase for jeff.key:
Verifying - Enter pass phrase for jeff.key:
In some cases, it is desirable to create a key that has no password. This also means the key is not encrypted, which has important security implications. If someone gets a hold of a key that has no password, they can use it to decrypt your certificate, which will allow them to read all the encrypted traffic. At OpSource, many SSL certificates are stored on the SSL accelerators built into the load balancers. Having the certificates on the load balancers requires having the key as well. Using a key with no password allows for easier installation on the load balancers. To generate a key with no password, simply leave out any encryption options. In the following example, we specified a key size of 1024 bits.
Generating a key with no passphrase:
$ openssl genrsa -out jeff.key 1024
Generating RSA private key, 1024 bit long modulus
.......................++++++
.........++++++
e is 65537 (0x10001)
The remaining examples use existing keys are using one that has no password. If you use a key that has a password, then you will be prompted to enter that password at the beginning of the listed process because the key needs to be decrypted before any other processing can take place.
Certificate Requests
As mentioned, the second part of the process is to generate a certificate request (CSR). The CSR will contains various pieces of information about the company as well as the hostname of the site. When creating a CSR, you can either use a pre-existing key or you can generate a new one as part of the process. A single key can be used for multiple CSRs. The most important part of the CSR is the Common Name. This must match the hostname for the site as used in URLs. If it does not, then browsers will display a security error to the end user, saying that the hostname in the URL does not match the name in the certificate. The exception to this rule is what's known as a wildcard certificate. A wildcard certificate is used for subdomains of a site. For example, a site that uses the following URLs:
- testing.app.company.com
- qa.app.company.com
- www.app.company.com
can all be secured with a wildcard certificate. To generate a CSR for a wildcard certificate, you need to prepend a *. to the hostname in the Common Name field. Using the example above, the Common Name would be *.app.company.com.
The OpenSSL command for generating a certificate request is the 'req' command. Additionally, since you'll be generating a new request, you need to add the "-new" option, otherwise, it'll expect you to provide an existing request. As before, you need to use the "-out" option and a file name or the CSR will be printed to your screen.
Generating a certificate request using an existing key:
$ openssl req -new -key jeff.key -out jeff.csr
You are about to be asked to enter information that will be incorporated
into your certificate request.
What you are about to enter is what is called a Distinguished Name or a DN.
There are quite a few fields but you can leave some blank
For some fields there will be a default value,
If you enter '.', the field will be left blank.

----
Country Name (2 letter code) [GB]:US
State or Province Name (full name) [Berkshire]:Virginia
Locality Name (eg, city) [Newbury]:Herndon
Organization Name (eg, company) [My Company Ltd]:OpSource Inc.
Organizational Unit Name (eg, section) []:Operations
Common Name (eg, your name or your server's hostname) []:www.someserver.com
Email Address []:client@opsource.net

Please enter the following 'extra' attributes
to be sent with your certificate request
A challenge password []:
An optional company name []:
The resulting file can be sent to a Certificate Authority for signing. They will then issue a certificate that can be installed in the web server or a load balancer. Remember, the key needs to be matched with the certificate so when submitting the certificate to your system administrator, remember to give them the key as well.
Self-signed Certificates
Certificate Authorities charge money for each certificate they sign. Costs can range from $150 for a single certificate good for 1 year to over $1,000 for a single certificate good for 5 years. Wildcard certificates generally cost much more. So what happens when you have a site that doesn't require a valid certificate, such as a development site or a QA site. These types of environments are generally not public-facing and don't require a valid certificate signed by a CA. In those cases, you can generate a self-signed certificate. This is a certificate that has been signed by itself and not a CA. These certificates will always generate an error in the browser. The process of generating them is similar in that you need a key (either pre-existing or generated during the process) and you generate a request but you then use OpenSSL commands designed for certificate management to sign the certificate. Generating the request and signing it are easily done at the same time. The specific OpenSSL options for this are the "-x509" option and the "-days" option, which allows you to specify how long the certificate is valid for.
Generating a self-signed certificate using an existing key:
$ openssl req -new -key jeff.key -x509 -days 365 -out jeff-selfsigned.crt
You are about to be asked to enter information that will be incorporated
into your certificate request.
What you are about to enter is what is called a Distinguished Name or a DN.
There are quite a few fields but you can leave some blank
For some fields there will be a default value,
If you enter '.', the field will be left blank.
-----
Country Name (2 letter code) [GB]:US
State or Province Name (full name) [Berkshire]:Virginia
Locality Name (eg, city) [Newbury]:Herndon
Organization Name (eg, company) [My Company Ltd]:OpSource Inc.
Organizational Unit Name (eg, section) []:Operations
Common Name (eg, your name or your server's hostname) []:www.someserver.com
Email Address []:client@opsource.net
This process can be shorten even further. This command performs everything necessary, from generating a 1024-bit key to the final certificate ready to be used. The "-nodes" tells OpenSSL to generate a key with no encryption and the "-keyout" is to tell OpenSSL what file to write the key to.
Generating a self-signed certificate and a new key that has no passphrase:
$ openssl req -newkey rsa:1024 -nodes -keyout jeff.key -x509 -days 365 -out jeff-selfsigned.crt
Generating a 1024 bit RSA private key
......................................++++++
...................................++++++
writing new private key to 'jeff.key'
-----
You are about to be asked to enter information that will be incorporated
into your certificate request.
What you are about to enter is what is called a Distinguished Name or a DN.
There are quite a few fields but you can leave some blank
For some fields there will be a default value,
If you enter '.', the field will be left blank.
-----
Country Name (2 letter code) [GB]:US
State or Province Name (full name) [Berkshire]:Virginia
Locality Name (eg, city) [Newbury]:Herndon
Organization Name (eg, company) [My Company Ltd]:OpSource Inc.
Organizational Unit Name (eg, section) []:Operations
Common Name (eg, your name or your server's hostname) []:www.someserver.com
Email Address []:client@opsource.net
Summary
The OpenSSL toolkit is a powerful combination of libraries and commands. The libraries allow developers to add strong encryption to products while the commands allow administrators to generate and manage keys, certificate requests and certificates. You can even establish a Certificate Authority with the OpenSSL toolkit, though there are some very important logistics surrounding physical, computer and network security, as well as management of certificates make this difficult to do properly.
The process of obtaining a SSL certificate for use with web sites is simple. The commands are few but the responsible handling of resulting keys, certificates and passwords are important and proper care needs to be exercised.
Before you install SMS you need to extent the active directory schema. to extend it you can follow the steps below
1. user should have the active directory schema rights if not add the user in “SCHEMA admin Group” in DSA.MSC
2. browse the SMS setup CD %cd drive %\smssetup \bin\i386\extadsc.exe from the command prompt and hit enter. your active directory schema will be extended.
*note :- to confirm you can browse through %system Root%\EXTadsch.log

What is Permissions:-
- Permissions define the type of access granted to a user, group, or computer to access resources.
- Permission can be applied to resources such as files, folders, and printers.
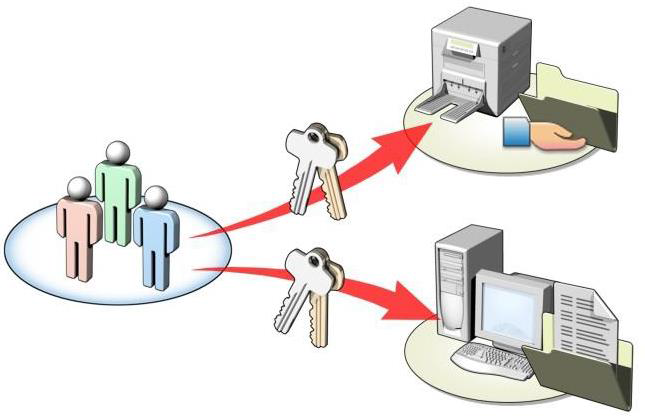
Types of Permissions:-
- Security Level Permissions
- Share Level Permissions
1.Security Level Permissions:-
- Can be implemented Only in NTFS partitions.
- Security or NTFS Permissions can be set on drives, Folders, and Files.
- By default, security permissions will be inherited from its parent drive or folder.
- File permission override folder permissions.
- Creators of the file and folders are their owners.
- Different security Permissions are
2.Share Level Permission:-
- It can be implemented on NTFS and FAT partition.
- It can be set on Drives and shared Folders but not files.
- What are shared folders?
- When you copy or move shared folder, the folder will no longer be shared.
- To hide a shared folder, include a $ after the name of the shared folder & users access hidden shared folder by typing the UNC path.
- Different Share Permission are
What is Tree:-
- Tress is a set of one or more domains with contiguous names.
- If more than one domain exists, you can combine the multiple domains into hierarchical tree structures.
- The first domain created is the root domain of the first tree.
- Other domains in the same domain tree are child domains.
- A domain immediately above another domain in the same domain tree is its parent.

What is Forest:-
- Multiple domain trees within a single forest do not form a contiguous namespace.
- Although tree in a forest do not share root a namespace, a forest will have a single root domain, called the forest root domain.
- The forest root domain is the first domain created in the forest.
- These two forest-wide predefined groups reside in forest root domain.
- Schema Admins
